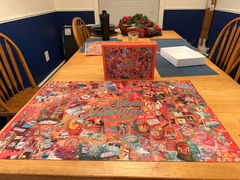
Pre-Printed Canvas
100% cotton, acid-free, gesso primed
Your design is printed and lightly sketched onto the canvas before it ships, so every stone has a marked place to land. No tracing, no transfer paper, no guessing.


Open it, pour out the stones, start. No trip to the craft store, no guessing which glue actually holds.
Your design is printed and lightly sketched onto the canvas before it ships, so every stone has a marked place to land. No tracing, no transfer paper, no guessing.
Every color is counted out for your specific design and bagged separately, labeled to match the placement map. Extras included, because one always rolls under the couch.
B-7000, the adhesive rhinestone artists actually use. It dries crystal clear, stays flexible so stones do not pop off, and the anti-clog tip means you get pinpoint drops instead of a mess.
Lifts stones cleanly without you ever touching them. One end places a single stone with precision, the other picks up several at once for filling larger areas fast.
Pour, shake, and the stones line up face-up in the grooves. This is the difference between a relaxing evening and a frustrating one.
One sheet, printed both sides, with a full-color preview of the finished piece and a labeled placement map showing where each rhinestone color goes.
All you add is a flat surface and good light.
No painting skill required. If you can match a color to a spot on a map, you can finish this.
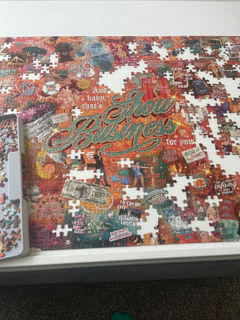
Pour each color into its own well in the grid tray and shake until the stones lie face-up. Keep the placement map beside you and pick a corner to start from.
Work in small patches, about the size of a quarter. The glue stays tacky for roughly three minutes, and that is your window to place and adjust.
Press the wax pen onto a stone, lift, set it on the canvas, press gently. Then do it again. This is the part people describe as weirdly meditative.
Lay the finished canvas flat for 24 to 48 hours before you hang it. That full cure is what makes it permanent.
There is no rush, and the glue will not punish you for stopping.
Same artwork, same stones, same finish. The difference is how it ends up on your wall.
Hangs the minute you finish it.
Slim, rigid, and easy to gift.
If it is a gift and you do not know their frame situation, go stretched. It hangs the minute they finish it.
| Component | Spec |
|---|---|
| Stretched canvas | 100% cotton, acid-free gesso primed, 5/8 inch pine frame, sawtooth hanger included |
| Canvas board | 100% cotton on acid-free MDF, triple-primed, warp-resistant |
| Rhinestones | 3mm round flatback, AB-coated, faceted resin |
| Wax pen | Fade-resistant barrel, precision tip, silicone wax included |
| Sorting tray | Ridged alignment grid with a pour-back corner |
| Adhesive | B-7000, 15 ml, precision tip, sets in 3 minutes, clear, waterproof, non-yellowing |
| Instructions | 8.5 x 11, double-sided, finished preview plus labeled placement map |
Still wondering something? Send us a note.
Contains small parts and is a choking hazard. Not suitable for children under 12. The adhesive is not appropriate for young kids.
Lay your finished canvas flat for 24 to 48 hours before hanging or gifting. Use the glue in a ventilated room and keep the cap on between patches.
Dust with a dry soft brush or a puff of compressed air. Skip cleaning sprays, solvents, and damp cloths on the stone surface.
Actual stone color may vary slightly from your screen. AB-coated rhinestones shift color as the light moves, so no two viewings look quite the same.
Rhinestone color may look slightly different in person. Screen display, lighting, and viewing angle all shift how the stones read. Finished pieces are typically brighter than photos suggest.
Unofficial fan merchandise. Not affiliated with, endorsed by, or associated with Taylor Swift, Taylor Nation, or any member of her team or official representatives. This is an original illustration inspired by a publicly worn stage look.